- Home
- Gallery and Artists
- About BAMM
- Members Area
- Resources
- Prompts from the Pros
- Prompts from the Pros - Sophie Robins
- Prompts from the Pros - Rachel Davies - Interwoven
- Prompts from the Pros - Lawrence Payne
- Prompts from the Pros - Alex McHallam
- Prompts from the Pros 2 - Escape with Bonnie Fitzgerald
- PftP2 Francesca Busca Eco Artivism - Fabric
- PftP2 Francesca Busca Eco Artivism - Metal
- Prompts from the Pros 2 - Francesca Busca Eco Artivism - Paper
- Prompts from the Pros 2 - Francesca Busca Eco Artivism Plastic
- Prompts from the Pros 2 - Joanna Kessel
- Prompts from the Pros - Helen Miles
- Prompts from the Pros - Julie Sperling
- Prompts from the Pros - Kelley Knickerbocker
- Prompts from the Pros - Marian Shapiro
- Prompts from the Pros - Rachel Sager
- Materials & Techniques
- History of mosaic
- BAMM Talks and Demos
- Useful links and groups
- Suppliers
- Prompts from the Pros
- Workshops/Exhibitions
- News
- Suppliers
British Association for Modern Mosaic
School mosaics: Mosaic people
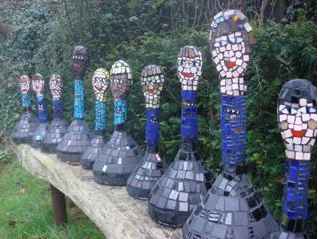
This project is suitable for all ages and is open to all kinds of different interpretations.
 This example was done by children aged 5 and 6, in groups of four. It took 4 mornings from 9-12 to make 10 statues, not including grouting. It involved 80 children.
You will need:
- a kitchen funnel
- a wooden spoon
- several rolls of modroc (2 per statue if using the small size of roll)
- vitreous glass tiles in a variety of colours, 20x20 and/or 10x10mm
(TIP... if you use ceramic tiles for the face you can shape them on site as the shards are not sharp, which is an issue with glass tiles).
 Instructions:
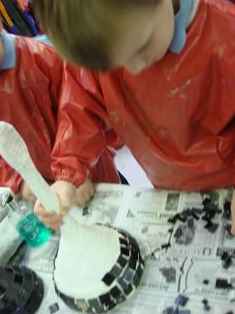
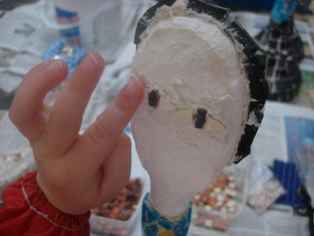
Place the funnel onto a table, push the handle of the spoon into the neck, until the spoon touches the table. Hold in place with a bit of tape and apply modroc in several layers, wrapping over the lower edge and tucking inside the funnel. If the funnel has a ‘tab’ try to centre it to be at the back of the statue, not at the front or oddly positioned to the side. The model's face is the front face of the spoon, when applying the modroc make this face flat. The modroc should be as smooth as you can make it. Leave to dry.
 Now you have a face, long neck and body to decorate.
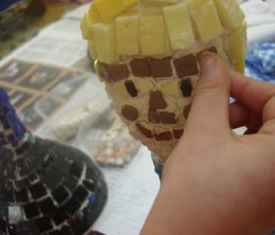
Depending on the age of the children (they may want to do this themselves) cut 20x20mm tiles into four quarters, rinse with water, though a sieve, (if they are glass) to get rid of any tiny shards of glass and dry. To save time you could also order some 1x1 tiles, but use with the irregularly cut 20x20 tiles mixed in, or the mosaic will look rather manufactured.
You could also use some whole tiles for the lower part of the statue. Children may not always place the tiles the right way up (they are ridged on the reverse), but don’t worry unduly, however be aware that these tiles will collect more grout.
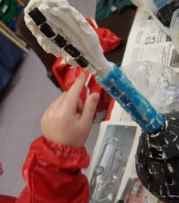
 Start at the bottom edge of the ‘skirt’, and work upwards. This way the children will have had some practice at laying the tiles before they work on the more visible and important areas.
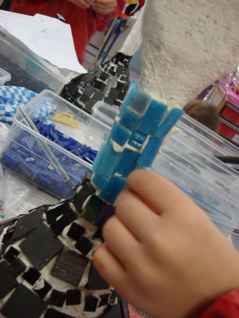
You need to use a ‘tile adhesive’ (if you use PVA the tiles will just slip off) such as BAL Mosaic Fix or MAPEI ‘Ultramastic’. The latter comes without a red ‘x’ on the back indicating it is safe to use with children (providing they do not eat it!).
Dispensing through a disposable piping bag (for example from Lakeland Plastic) means you can pipe the glue exactly where it is needed, then the children can press the tiles into the glue. Older children will love to dispense the glue themselves. Laying the glue in lines helps lay the tiles in an orderly way,
It is essential you take a break, every 10 mins or so, to scrape away any excess glue, as you do not want it to rise up between the tiles and be visible later through the dark grout as white ‘mountain peaks’. Have a sharp tool, eg. wooden skewer, to hand to do scrape away the excess glue. It is easier to do it when the glue has started to dry out and becomes crumbly.
 (TIP. You can colour stain your adhesive, if you are using BAL mosaic fix, with black cement stain powder (available from DIY stores), so your grout and adhesive are the same dark tone. However white adhesive is cleaner for small children.)
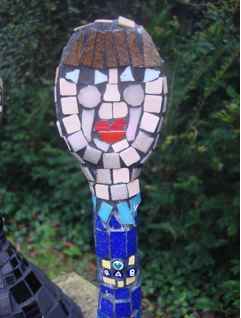
Keep working up the model until it is completely covered. When it is finished and the adhesive is dry, grout carefully with grey or black grout (never white!). Trim any excess modroc away from the inside the funnel and seal the edges of the underside with transparent or black sealant (used in bathrooms or for sealing drainpipes). This makes the model waterproof for placing outdoors, and also prevents it from scraping surfaces when used within schools. If you leave any modroc exposed it will act as a sponge, soaking in the moisture, which will then ‘blow off’ all your tiles. Push a tent peg through the tab of the funnel, to secure the statue to the ground.
© Anne Cardwell October 2008
![]()
![]()